Flashings cover the joint between two different parts of the building – such as the join between the roof and the chimney. They sometimes act like gutters and carry a lot of water, so dealing with leaks is important.
Where are flashings found?
Flashings can be found on many parts of your building.

Replacing flashings
Flashings can be made from a number of materials:
- lead is often the best material for flashings as it is flexible, long-lasting, and capable of being welded – a correctly installed lead flashing should last at least 60 years
- zinc can also be welded but is less easy to shape – can last at least 30 years
- bitumen compounds (“Nuralite”) have lasted for over 30 years, however they do become brittle with age
- mortar fillets may be used at the skew
- polymer – a variety of trade products are available with life lengths from 20 – 30 years but some of them are nearly as expensive as lead
More about lead and alternative flashing materials
Typical ways of constructing flashings
Mortar flashing
 Cracking is a common defect. Image courtesy of Historic Environment Scotland.
These may also be called ‘fillets’ or ‘flaunching’ and are often used at the skew. A piece of wood called a ’tilting fillet’ is used to lift the edges of the slate, so that water runs away from the join. The joint is then covered with strong hydraulic lime mortar.
Keep an eye open for cracks and loose sections of mortar.

Lead flashing to skew
 Lead flashing to skew. Note the skew is low here, so the flashing has been taken over the top of the stone to give sufficient depth.
The flashing here forms a channel or ‘watergate’. The drawing shows that this is made of lead but other materials can be used. Note the edge of the lead is folded over on one side to stop capillary action taking water under the slates. The edge by the skew has a cover flashing.
Valley flashing
Used where two roof slopes meet at an angle, these are sometimes referred to as valley gutters.
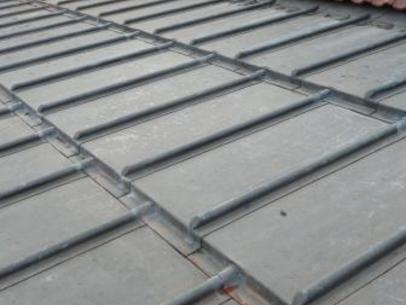
 Valley flashing. The lead valley flashing is dressed over timber fillets to form a gutter. Laying the lead in sections and fixing the sections at the top only allows for expansion.
Central valley flashing
 Central valley gutter or flashing
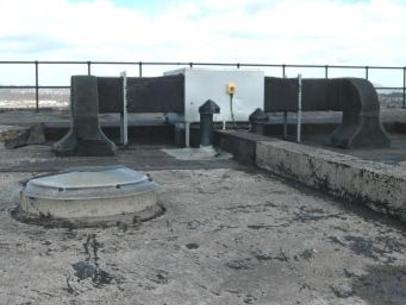
These may have very wide flat bottoms and are often found on central valley roofs. Otherwise, they are similar in construction to other types of lead flashing. Where they are very wide, they should be formed like flat roofs.
Lead bottle flashing
 Lead bottle flashing. Used here to join two types of roof.
The drawing here shows a lead bottle flashing used to cover the join between a slate and tiled roof. The lead is folded tight over a timber roll. Sides to the channel are made by folding the lead over strips of timber.
 Lead bottle flashing. This type of joint is used to form a flashing between two different roof finishes. There is a lead gutter on each side of the raised ‘bottle’.
Problems
- flashings can be lifted or torn by wind
- lead flashings can be corroded by acid run off
- incorrect laps or fixings
 Wind damage to flashing
Professional help recommended?
Although the work may appear straightforward, ensure your builder or tradespeople have the skills for the job. If in any doubt, get professional help to specify and organise the repair. Consider using a firm who is a member of the Lead Contractors Association or whose key workers have the appropriate qualifications.
 Incorrectly laid lead flashing. Lead has buckled with expansion.
Who pays?
These are normally common or mutual repairs.
Further information